Good day everyone!
As I have received several requests, and I am always glad to oblige, in this post I will present the step by step on how I painted the freehand dragon on the banner of the Dark Elf Sorceress.
By the way, I have also posted the pictures of the sorceress on both CMON and Putty and Paint. I would really appreciate your vote 🙂
Before I start this tutorial, I must say that following the workshop by Stephan Rath (my report here) has given me the first real introduction into painting freehands like this, so he is also to be thanked for this step by step!
The first step is to prime the banner using white primer spray. In a previous step-by-step I already showed how I made the banner.
Step 1
Creating a anatomically correct drawing, that doesn’t look super cartoony is not something I can do without using some guidelines, and also it is not always easy to come up with your own drawing. So I decided to use some google-fu to find a picture/drawing of a drawing I liked.
It was not my intention to make an exact copy of the drawing, there are details that would make it look too crowded in this scale. I decided to go with my gut feeling a bit here.
Step 2
Using a grid can make copying an existing drawing a hundred times easier, so why not use this simple trick?
Using a pencil, I drew a grid on the banner, with 3,5mm squares, and I drew the same amount of squares in a grid on the print-out of the original drawing.
As you can see on the printout, I used an orange marker to draw the general shapes of the figure. I will use this as a guideline in the next step.
Step 3
After that, I started by copying the orange lines in the printout onto the banner. I used a dark purple paint for this, that was diluted 1 part water, 5 parts paints (approximately).
The dragon in the original drawing did not have a neck, and because I didn’t want a floating dragon head I sketched the neck and start of the torso myself, directly onto the banner.
Step 4
This step is an easy paint-by-number step 🙂 I simply block in some diluted colours to get a general idea of everything. It is actually smart to erase the pencil grid before this step, because when it covered with paint this becomes a lot more difficult. I was not so smart, but in the end you cannot see this anymore as it is covered with opaque paints.
I painted the background, because a white background would look too stark. To make the dragon stand out I tried to paint the areas closer to the dragon brighter than the ones further away.
As you can see I also painted the eyes.
Step 10
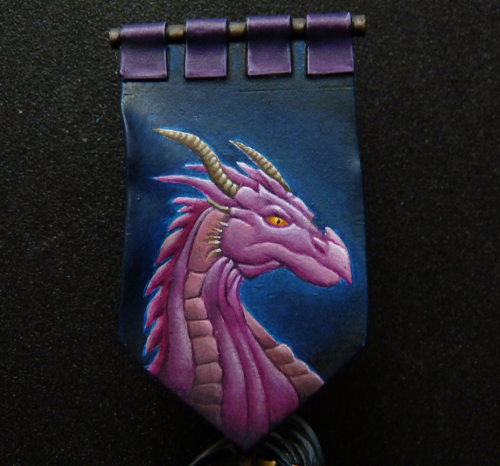
Lastly, of course I needed to clean up some areas, add some more glazes and paint the rest of the banner. You can see the finished result at the start of this post.
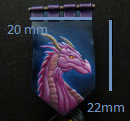
As some people suggested, here is a scaled picture.
I hope you enjoyed this step-by-step! If you have any suggestions for other step-by-steps or tutorials, please let me know 🙂




1 comment
Thank you so much for taking the time for this step by step! It was very informative.