Hi everyone!
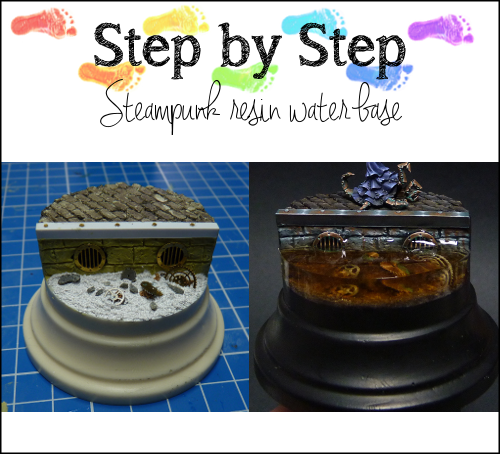
Today I would like to share the making of the base for my latest project. Pictures of the completed mini will be uploaded to the gallery soon ;).
I decided to make a slightly more elaborate base – for my standards – for this mini, because I thought it would work well with this mini. Still I tried not to overdo it, by making the base too detailed. The mini is already very detailed and I want to keep her the center of attention. I will focus this step by step mostly on the pouring og the resin, as I got a lot of questions about that!
Making the base
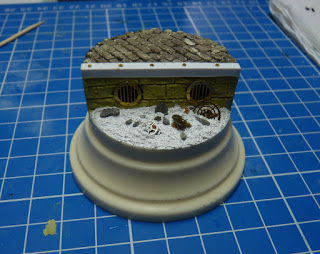
I started by cutting a squared piece from the resin base with a metal saw. Then I build some support for the wall with plastic card, adding some holes where the drains would come. I sculpted the wall using milliput, build up the pavement using Juweela bricks and added some Vallejo White Pumice to the bottom of the base. I added the plasticard strip and on top pasted some tiny bolds that came with the Etch Master photo-etch steampunk sheet. The parts for the drains and one of the cogwheels also came from that set. The other cogwheels are from Hasslefree. I added some tiny stones and then I was ready to start painting.
Painting the base
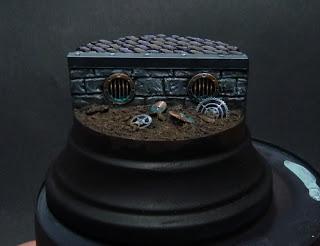
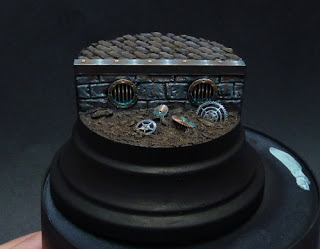
I painted the base in two steps. First paint everything in clean, and then add pigments to create weathering.
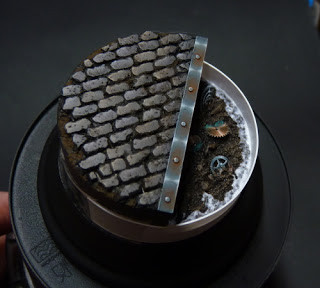
This is painting before weathering. I also painted in the verdigris on the copper.
And after weathering. For weathering I used Raw Umber from Model Display Products and Light rust from MIG.
Now it was time for the resin… the point of no return…or, where everything can collapse!
Adding resin water
I’ve played with resin water before, and I always find it tricky. It doesn’t always turn out the way I would like.
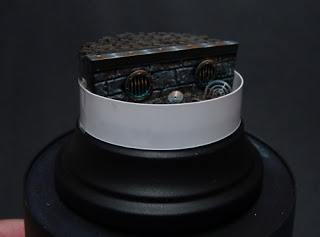
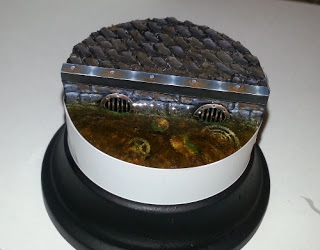
Before you can pour the resin you need to make a reservoir to pour into. You can do this with a transparent tape, or as I did with a thin piece of plasticard. I cut the plasticard to the desired height (in hindsight it would’ve been better to make it a little lower), wrapped the plasticard right around the base and taped it to the plinth.
Sometimes the resin can seep through the cracks, where the plasticard and the bottom of the base meet. Therefore it is best to lay down a protective layer to seal the tiny holes. I used water effects from Vallejo for this. However, I would not recommend this. When my base was done, this stuff turned a little sticky. I have to search for another product for this.
When the protective layer is dry, for me that was about half a day, you can start by pouring the resin.
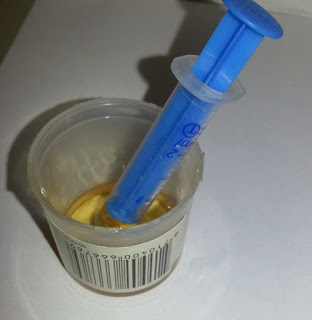
I used Ziterdes 2K water for this. This is a two part resin. You have to mix the two components (resin and hardener) in 1:1 ratio. I did this by using a syringe and taking out equals parts and put it in a small plastic container. Then you have to mix it….thoroughly…really throughly. Don’t start mixing like a madmen because you will create bubbles, but mix it at least for 5 minutes, till you get an even mass.
As you can see in the picture my resin is a bit orange, this is because I am using an old product. For me that was fine, because I wanted to have a colour to my resin.
Then I used the syringe to add the resin in the basin. If you pour in a bit more than just the correct height (so that the resin will look round on top), then you will end up with a flat top in the end. The resin shrinks a little.
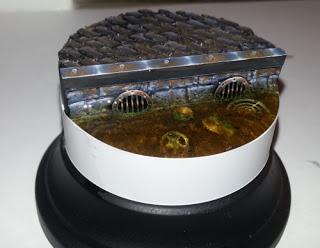
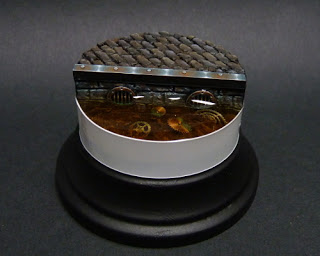
This is what the base looks like after pouring. As you can see there are quite some tiny bubbles. The bigger ones I popped with a tiny stick, the rest will dissappear with some patience :).
Then it was time for the long wait…
After two days my resin was still sticky on top. I usually keep the left-over resin that I mixed to check how hard the resin is. That way you don’t have to test it on your base. Below you can see how the resin has become clear.
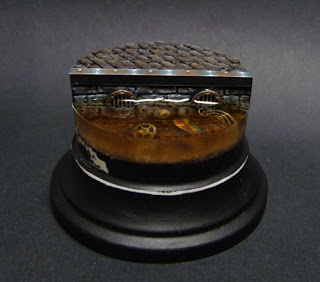
One day later the resin was completely hard and I removed the plasticard.
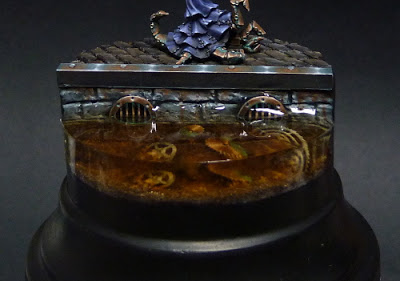
Oh no!!! It is all fuzzy on the sides!! No problem, we can fix that! I used some fine sanding paper to get the edges smooth. After that, you can simply brush on some gloss varnish to the water edges and it will become translucent. After that, I cleaned the black edges of the plinth with some black paint, and that’s it! Base is done :D.
I hope you liked this step-by-step. Please let me know if anything is unclear. Also, if you are interested in other tutorials, let me know and I will see what I can do.
See you soon!




1 comment
Beautiful work! I’ve always wondered how to do this! Great tutorial. – Heroes & Bosses