Hi everyone!
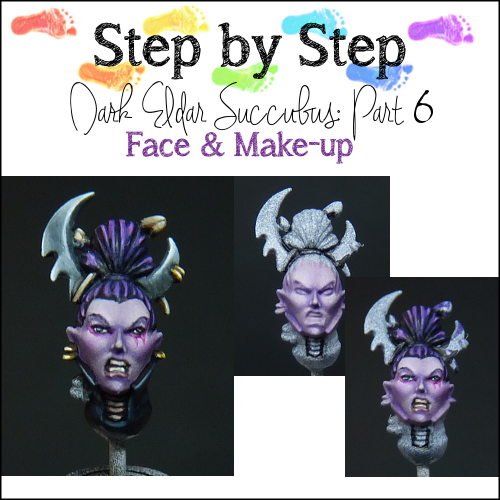
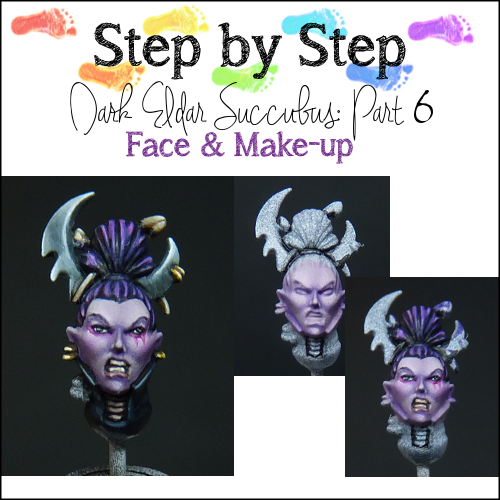
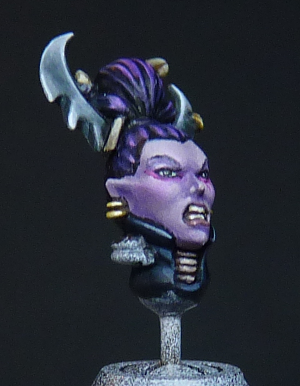
Today I want to share the latest installment of the Dark Eldar step-by-steps! This time I am guiding you through the painting of my favourite part of the mini: the face :). I absolutely love painting faces, especially of female characters. It is very nice to play with highlights and shading on the face, and of course add some feminine make-up.
In my opinion painting faces is no magic, just follow the rules of zenithal highlighting and slightly exaggerate some features. Also, be patient. Slowly build up the details and take time to fix mistakes. After I took my pics I still noticed some rough spots that I will correct afterwards.
Just to give you an idea of the time I spent on painting the face: For this tiny head, which measures 4mm (flesh area), after painting the fleshtones (see below) I spent almost 3 hours painting the details, eyes and make-up.
Disclaimer: As I said before, the face is tiny. Therefore it was quite hard to get sharp pictures of every step. Also, the painting of the face is a lot of going back and forth, spending most time fixing mistakes and smoothing surfaces. Nonetheless I hope this gives you an idea of my elaborate process :).
Fleshtones
I painted the face together with the rest of the body, to make sure I use the same colour. As the mix was self-made it is easier to paint the parts at the same time to prevent differences in tones. Previously I have posted the SBS on painting the dark eldar fleshtones. For the face, the steps are the same.
 |
| Click to enlarge |
From left to right: Basecoat, 1st shadow, 2nd shadow, first highlight, second highlight, third highlight. On the face I try to make the highlights bigger than the shadows, as it is a prominent feature of the mini and it is also the highest point.
I’d like to share a few tips on painting female faces.
1) Be smooth. Ladies do not have strong features as men do, so try to keep the transitions smooth. Also don’t make the shadows to stark.
2) Placement of highlights and shadows is essential. If you find it difficult to see where they should be, you can google some “make-up contouring” pictures (see below).
3) A little make-up can help give life to a face. Again, look on the internet for pictures or ask your lovely lady(-friend). Painting in a little bit of blush (rouge) and eyeshadow is really pretty! But take care not to use garish colours and try to stick with colours that fit the rest of the mini, or preferably are used on other parts of the mini.
5) Do not forget about highlighting the sides of the nose. They don’t always have to be prominent, as are the ones on the dark eldar lady, but a little accent makes it look more realistic.
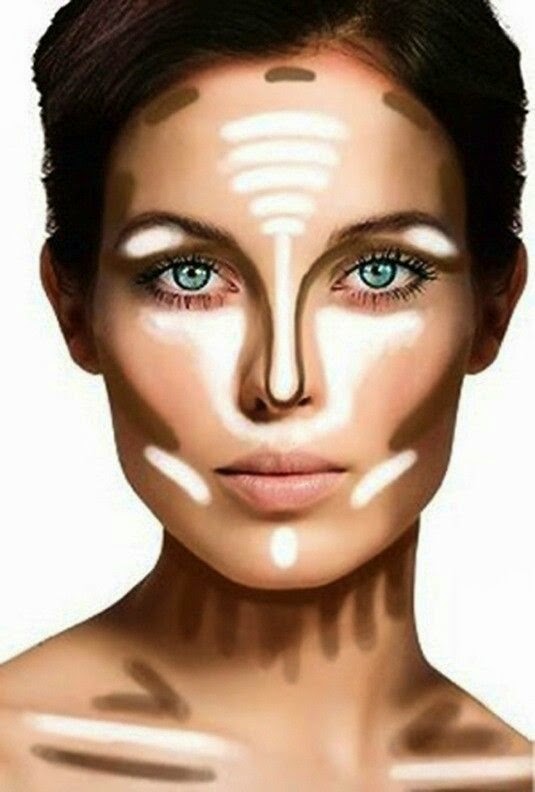 |
| Reference for painting highlights and shade (I do not own rights to this picture) |
Warpaint
On Facebook, someone (sorry I forgot who it was and I cannot find it back easily) suggested to paint some warpaint. I didn’t plan this in the beginning, but of course I wanted to take the challenge :).
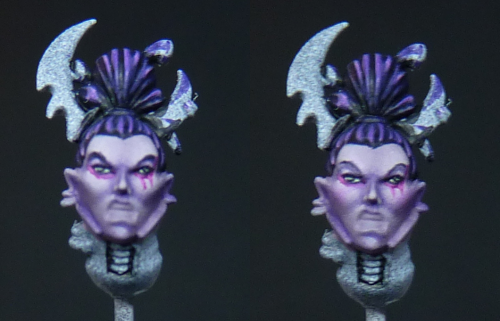
Basecolour (picture 1 & 2):
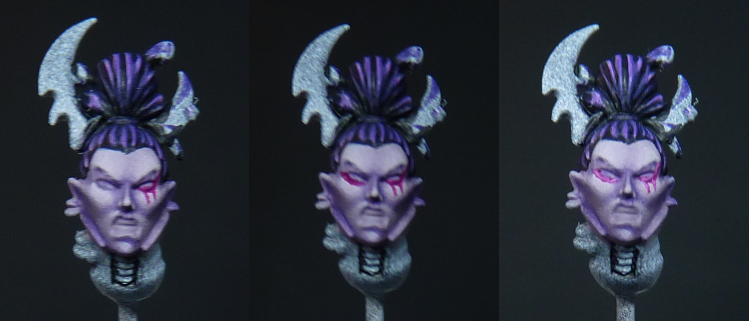
I painted a line underneath each eye with the basecolour: Warlock purple (GW old colour). On the left eye I made the lube a little thinner and added two vertical lines. I also made a line on the side of the eye going up.
Highlight:
To add some interest, and also to prevent the warpaint to look too much like dripping blood, I added a highlight. I added some Pink (vallejo) to the basecoat. Mix was about 50:50. I painted that inside the basecolour. On the right pic, it still looks a little rough but I corrected that a little later by adding a glaze of warlock purple.
Eyes
Eyes are an essential part of the face. They are often also very small. Depending on the size of the eyes you can add details such as coloured irises etc. For this lady I decided to only do a reflection on the pupil. There is already a lot of colour on the face, so I decided to skip the coloured iris.
Blacklining
I start by blocking in the complete eye. I use Vallejo Camo Black Brown for this. I tried to not cover the pink warpaint. But little mistakes can always be fixed. A little note on painting eyes: do not use too much dilution. Having to cover a small area with multiple layers only increases the chance to make mistakes. Also make sure not to have to much paint on your brush or you will lack control.
Painting the white of the eye
Then I used Pale Sand (Vallejo) to paint in the white of the eyes, making sure to leave the tiniest line of brown on the outside. For me painting the right eye is always easier, if you have the same problem you can try turning the mini upside down to paint the right eye ;).
Painting the iris
I then painted the iris using Chaos Black (GW). You definitely don’t want googly eyes, so always make sure that you don’t see white above or below the iris (unless the mini is supposed to be looking up or down).
Painting in reflections
Using Pale sand I painted a super tiny dot for the reflections, slightly above the center of the iris. For me reflections in the eye makes it look more lively.
Corrections & eye-liner
I am never able to do this all perfectly in one go, so after the steps I took some time to fix little mishaps. I also painted a thin line of Camo black brown on top of where the lash-line should be, to represent an eyeliner and give more definition to the eyes.
Note: If you are really critical you can see that the eyes I painted are not perfectly centered or exactly the same. But honestly you can absolutely not see this without using extreme magnification :).
Painting the eyelids & some tips on make-up
In this step maybe you can see already where I went wrong. But I will show you anyway.
Basecolour
I painted the eyelids in the basecolour for the fleshtone, except I added a tiny bit of extra Genestealer purple (GW). To give it a little bit more colour, you can hardly see the difference though.
Shading
Then I added some shades by adding a little bit of black to the previous mix (3:1 ratio). I shaded the upper part of the eyelids towards the brows. By adding a bit more black I painted in the brows as well.
Highlights
I painted a highlight on just the eyelid by adding pale sand to the basecolour.
At this point I realized the eyebrows looked too strong, and there is something I didn’t like about it. So I went back through some make-up references and my common sense.
I had painted the crease: the little fold in the eyelids. Make-up artists often emphasize this part with darker eyeshadows. But what I forgot was a little highlight underneath the brows. It lifts the face and gives a open eye-look. See some references below. So I corrected that, you can see it in the next pictures.
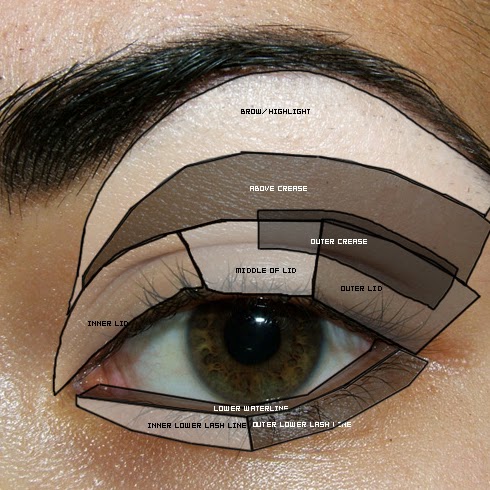 |
| Picture from Temptalia. |
Blush
To add a bit of warmth and life to the face I painted in some blush using Pink (vallejo) which I diluted to glaze consistency. It is very subtle, but I think it makes a difference :).
On the picture above you can see I corrected the eye make-up, including a little highlight underneath the eyebrows. I also made the eyebrows a bit thinner. If you look closely, you can also see the little bit of blush I added to the cheeks.
Painting the mouth
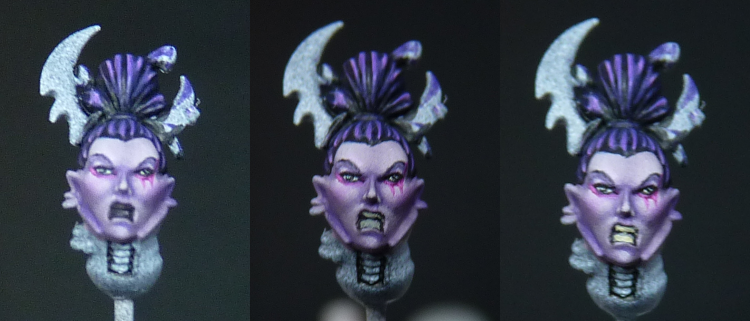
Then it was time to paint the mouth & teeth.
Blacklining
I painted the entire mouth with a mix of German Camo Black Brown (Vallejo) and Hull red (Vallejo), mix 2:1. I added the red colour because I thought it would look a bit better on the mouth.
Basecolour teeth
I painted the teeth using a mix of Pale sand and German Camo Black brown (3:1 mix).
Highlight teeth
Then adding more Pale sand I painted a slightly smaller area of the teeth.
At this point it still looked a little rough. So I decided to do a little wash of Devlan Mud. I painted the stripe between the upper and lower teeth again. And lastly I highlighted the canines with pure Pale Sand. You can see the results in the pictures below.
Painting the lips
Last, but certainly not least, I had to paint the lips. I wanted to give the lips a more natural colour, as the skin tone is already quite “different”. I also didn’t want to emphasize them too much. So I decided to go for a natural glossy lip.
Basecolour
I mixed a basecolour of Hull Red, Basic skintone (vallejo) and Pink, in a ratio of 2:3:1. I painted this on the lower lip and a very thin line on the uper lip.
First Highlight
On the lower lip I painted a highlight by adding more Pale Sand to the previous mix. I think about 1:1.
Spot highlight
On the right side of the lip I added a small spot highlight with pure Pale Sand, to make the lips look a little glossy.
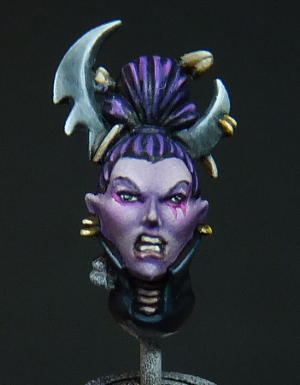
Finishing the face
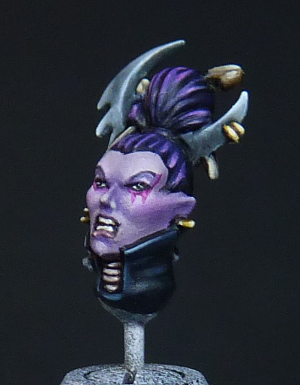
Then it was time to paint the black collar, the spikes in steel NMM, the gold NMM details and the bone hair decoration. I used the same colours as in previous step by steps. Click on the links to see them. Oops! I forgot to paint the hair band, I will paint that later :). The hair is not finished yet, when it is finished I will post the SBS for that as well.
Well that’s it! I hope you are still enjoying these posts :). This was by far the longest, and took quite some effort to make. But it is great to be able to share it with you all!
Just for fun: The real size (as I see it on my screen)
