


Hi everyone!
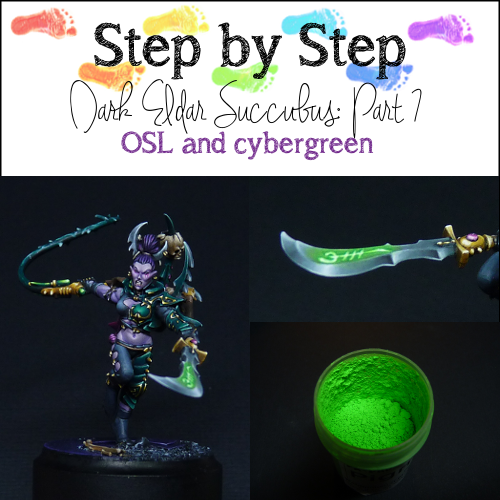
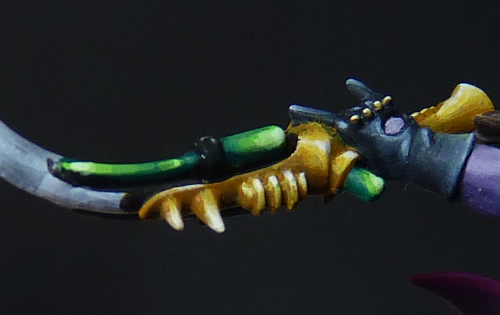
It’s been a little while, but finally it is time for the latest installment of the Dark Eldar Succubus step-by-steps. In this post I would like to share how I painted the OSL (Object Source Lighting) on the blade and other cybergreen parts (I don’t really know wat it is supposed to be, but I thought of it as some tubing with fluorescent goo in it).
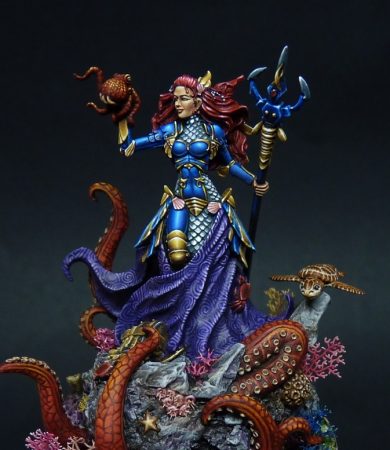
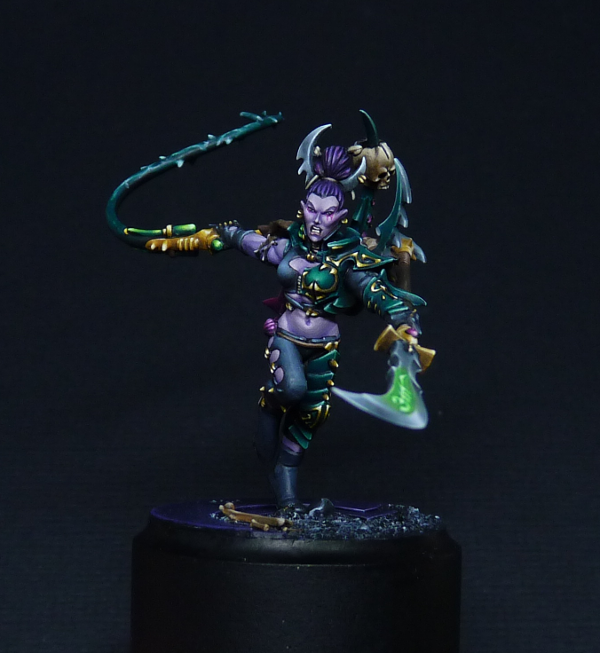
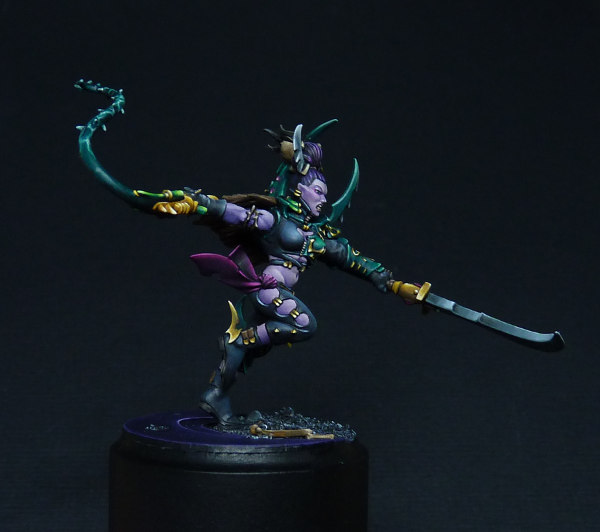
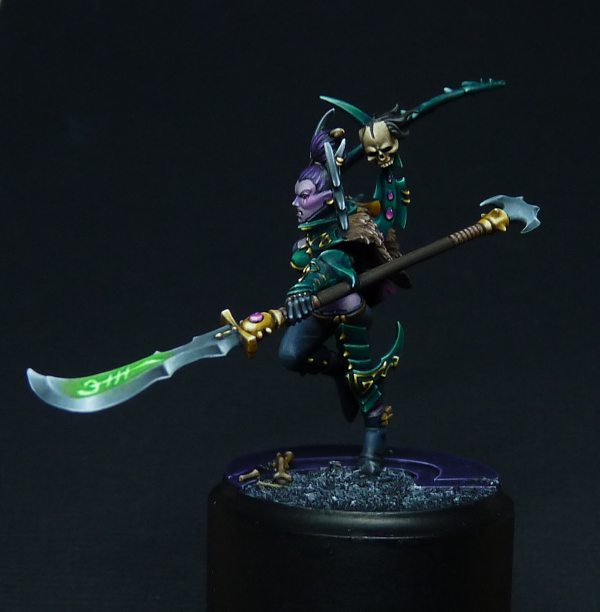
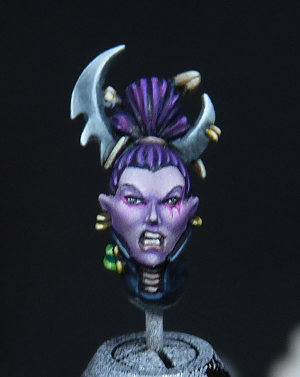
On a sidenote: The girl is now finished, so here are some pics! I would love it if you vote for her on Putty & Paint or CMON.

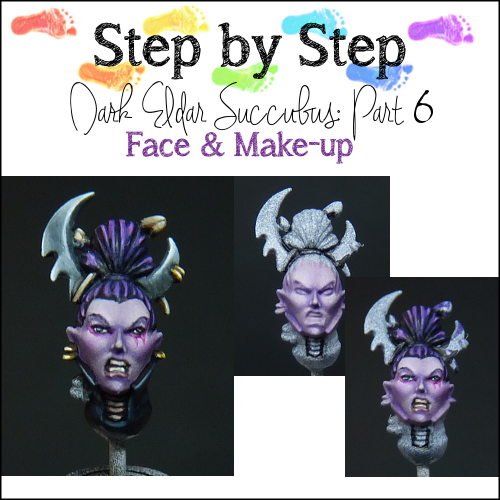
A summary of all the previous step-by-steps can be found HERE
In the following steps I have used a dayglow pigment, or daylight fluorescent pigment, by PK Pro to create a very bright effect. You can create the OSL effects without these pigments, but I wanted to try it out in this way and I quite liked how it turned out. I do have to mention that I had difficulties painting with only diluted pigment, as it became very rough and granular, despite a good dilution. Probably it would be better to dilute the pigment with acrylic binder (as I have read on this great post on Massive Voodoo), but mixing it in with paints also works fine enough.
So let’s start!
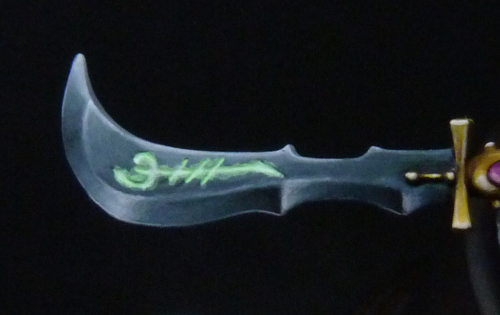
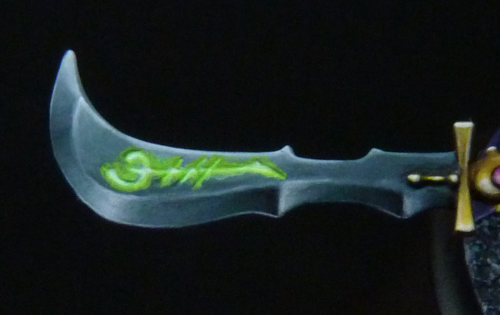
OSL on blade
Step 1: Highlights
For OSL it is much easier to work backwards then my normal trategy (start middle colour, then shade, then highlight). Therefore I start by painting in the highlights, which is the area that is supposed to emit the most light. This blade has some nice details carved in, and I painted the whole recessed area with a mix of white and scorpion green (GW, old colour) in a ratio of 3:1.
Don’t worry about painting over the sides of the carvings, because you can clean that up later.
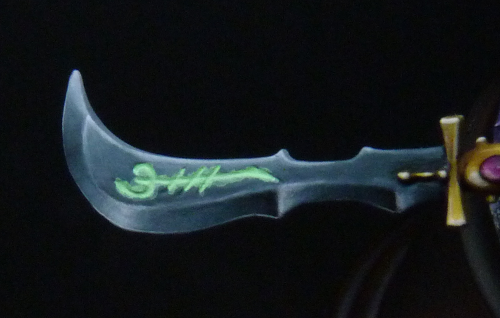
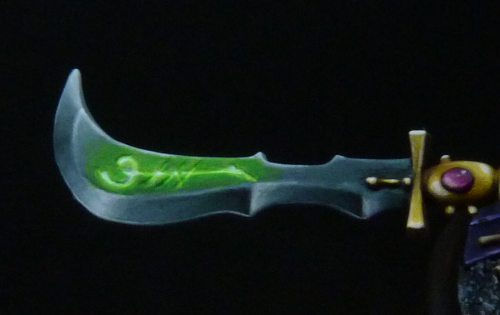
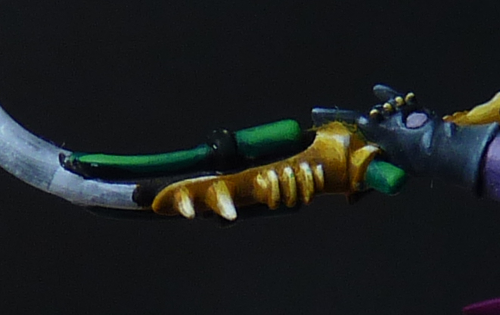
Step 3: Glow pigments on the edges
In this step I painted the edges of the carvings with dayglow pigment in the colours glowing wood by PK-pro, mixed with scorpion green. I think about 1:1, but it’s hard to guess. The colour is very undiluted as you can see on the picture.
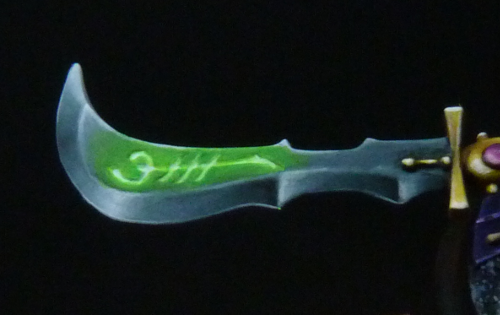
Step 4: Painting the glow
Then of course a lighted object will emit light and will cast a glow on surrounding areas. I wanted to keep that area relatively small to not obscure too much of the painted NMM on the blade.
I used the same colour as in the previous step, diluted to a glaze consistency. The closer to the carvings the more layers I painted of this mix, to make it look as if the colour fades the further away it is from the light source.
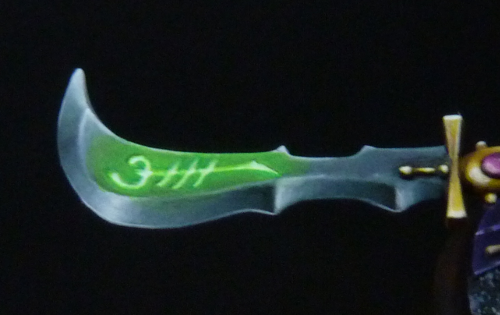
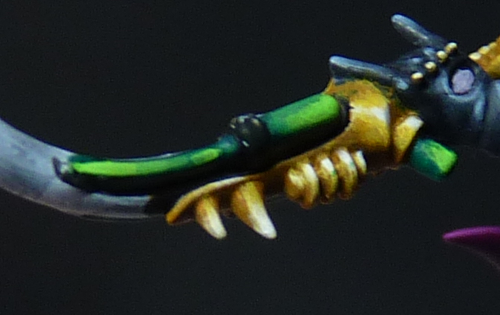
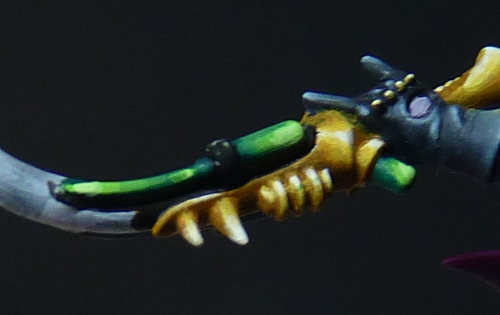
Step 5: Clean-up
As the blade was looking a bit messy, I cleaned it up, using the same colours as before.
Step 6: Highlights again
During the clean-up I had lost some of the highlights inside the carvings, so I carefully painted them in again using white. I also wanted to increase the contrast a little, so I added a bit of kabalite green to the glow mix (1:1) and painting that on the very edges of the carving. Sadly, because the dayglow pigments effect the pictures a little I did not manage to capture that clear enough.
Here’s what it looks like in respect to the rest of the mini:
Cybergreen
These parts were painted in another reverse way, namely by starting with the darkest colour.
Step 1: Basecolour
I started by painting the whole area with a mix of Incubi darkness and kabalite green. If you have followed all the step-by-steps you might remember that I used these same colours for the base of the armour. I did this to make sure there is some coherence between the colours. Still, by using different colours in the highlights the end result looks very different from one another :).

Step 2: First Highlight
Using pure kabalite green I painted a bit smaller area. In all these steps my paints were diluted to somewhere between basecoat and layering consistency. It is a small area, and I wanted to paint it quickly.

Step 3: Second Highlight
I added some scorpion green to the previous mix, 1 part SG and 2 parts of kabalite green. I have used the same colours here as on the OSL, so that it looks as if the fluids in the tubes cause the blade to glow up. I don’t know if that makes sense in the fluff of these alien ladies, but it sounds cool 🙂
Step 4: Third Highlight
I mixed some of the dayglow pigment with the scorpion green, about 1:1 and painted that as the next highlight.
Step 5: Fourth Highlight
To make it even more vibrant I added some more dayglow pigment (1 part) and some white (2 parts) to the previous mix (2 parts).
Step 6: Spot Highlights
Of course, so area on this mini will go without spot highlights :P, so I painted in spot highlights using pure white. After that, I smoothed out some transitions but I forgot to take a detailed photo of that.
I painted the tubing aroung the ladies neck in the same manner as described above.
I hope you all enjoyed this post! And, more importantly I hope you like the end result of this project :). It was definitely interesting to take pictures of each step, really makes you think about your own painting techniques….


